
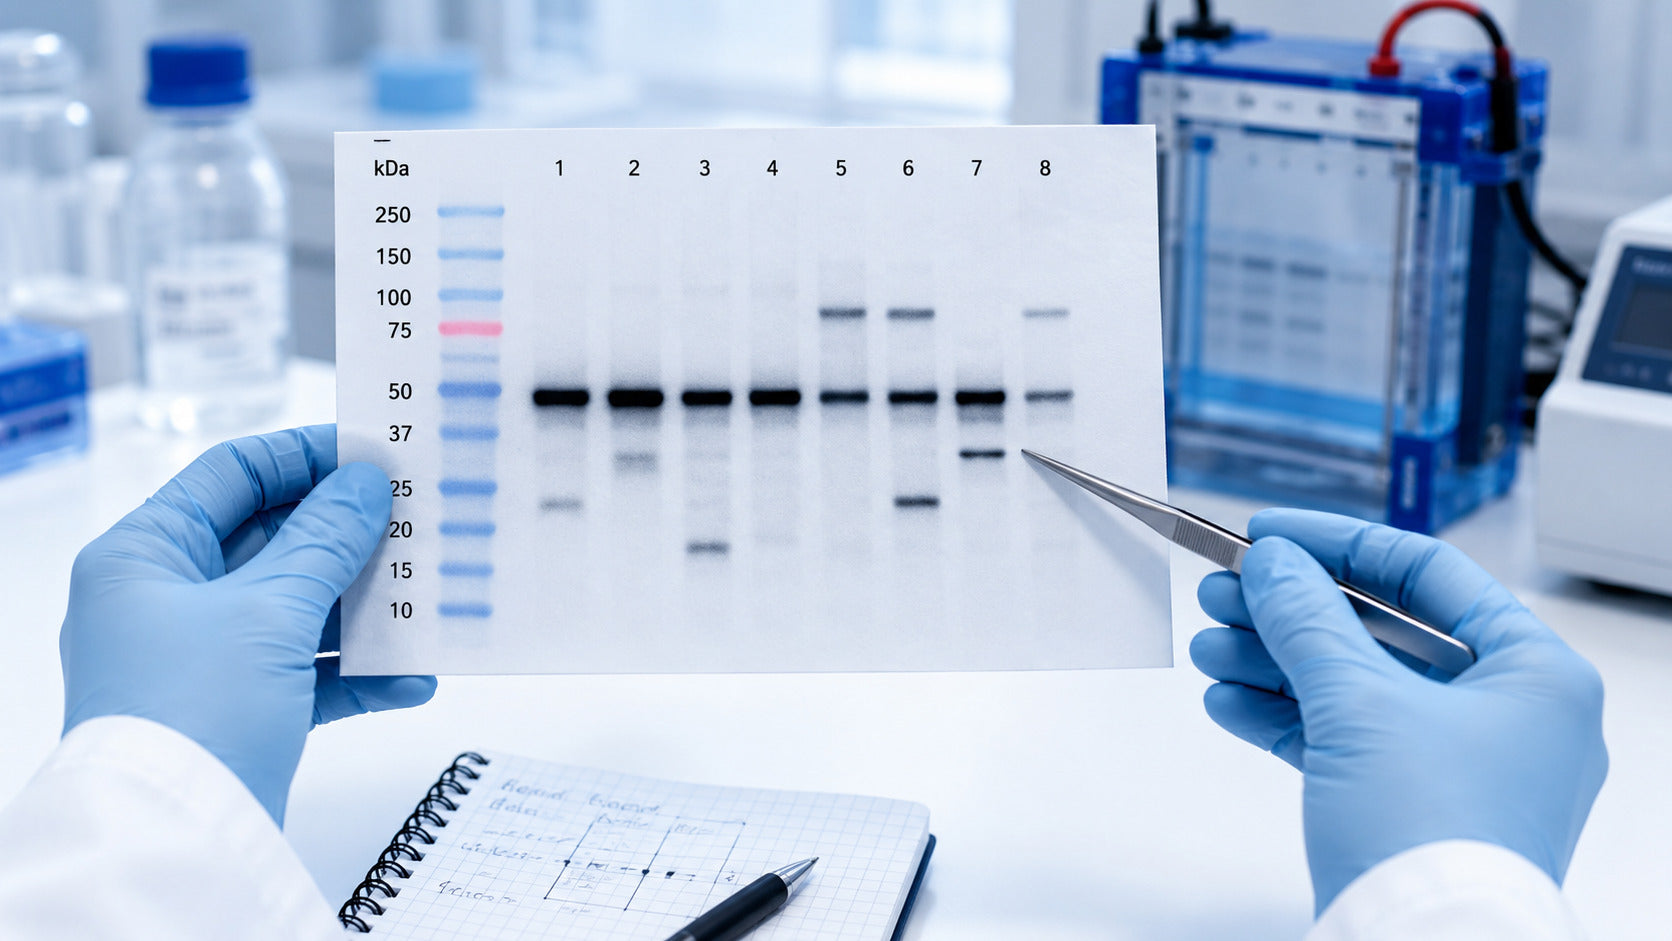
Western blot bands running lower than expected may result from protein degradation, proteolytic cleavage, or smaller isoforms and splice variants. Bands appearing higher than expected may be caused by post-translational modifications, such as glycosylation, or incomplete reduction and denaturation that allow protein multimers to remain intact. Incorrect gel percentage, electrophoresis conditions, and non-specific antibody binding can also produce unexpected band positions or additional bands.
This result can feel confusing at first, but it is often easy to troubleshoot when the pattern is reviewed step by step. A shifted protein band does not always mean the experiment has failed. It may point to a technical factor, such as gel percentage or sample preparation, or a biological factor, such as protein cleavage, isoforms, or post-translational modification. This Western blot troubleshooting guide explains why protein bands may appear at the wrong size and how to improve the workflow for clearer, more reliable results.
What Does It Mean When Western Blot Bands Appear at the Wrong Size?
In Western blot, the expected protein size is usually based on the predicted molecular weight from the amino acid sequence. But the observed band size can be different because proteins do not always migrate exactly according to their theoretical size.
Protein folding, SDS binding, post-translational modifications, degradation, cleavage, splice variants, and incomplete denaturation can all affect migration during SDS-PAGE. Bio-Rad notes that lower molecular weight bands may be linked with cleavage, degradation, splice variants, or detection of another protein with a similar epitope. A small shift may be normal for some proteins. A large shift, repeated unexpected band, or multiple bands should be reviewed with controls and a structured troubleshooting approach.
Why Are Western Blot Bands Lower Than Expected?
Western blot bands lower than expected usually mean the detected protein migrated faster through the Gel or the antibody is detecting a smaller form of the protein.
Protein Degradation During Sample Preparation
Protein degradation is one of the most common reasons for lower protein bands. During lysis, proteases can break the target protein into smaller fragments. If the antibody-binding region remains present in the fragment, the antibody can still detect it as a lower molecular weight band. To reduce degradation, keep samples cold, work quickly, use fresh protease inhibitors, and avoid repeated freeze-thaw cycles. FireGene’s protein lysis guide also explains that poor lysis can lead to protein degradation, weak bands, inconsistent loading, and loss of important protein modifications.
Natural Protein Cleavage
Some proteins are naturally processed into smaller fragments. This can happen during signaling, apoptosis, activation, maturation, or cellular stress. In this case, the lower band may be biologically meaningful rather than a technical issue. Check published literature, protein databases, and the antibody datasheet to see whether your target has known cleavage products.
Smaller Isoforms or Splice Variants
Many genes produce more than one protein isoform. If a smaller splice variant is expressed in your sample, the antibody may detect a lower band. This is especially important when comparing different tissues, cell lines, species, or treatment conditions. A second antibody targeting a different region of the same protein can help confirm whether the band is a true isoform.
Gel Run for Too Long
If the Gel is run too long, proteins can migrate farther than expected. This can make bands appear lower on the blot. Monitor the molecular weight ladder during electrophoresis. Stop the Gel when the ladder is well separated around the expected target size.
Acrylamide Percentage Is Too Low
Low acrylamide gels have larger pores, allowing proteins to move more easily. This is useful for large proteins, but smaller proteins may migrate too quickly and appear lower than expected. For low molecular weight proteins, a higher percentage gel usually gives better separation. For a wide protein size range, a gradient gel can be helpful.

How to Fix Western Blot Bands That Are Lower Than Expected
When bands appear lower than expected, start with sample quality before changing the whole protocol.
Improve Sample Handling
Keep lysates on ice, add fresh protease inhibitors, and process samples consistently. Store protein samples at suitable temperatures and avoid repeated freeze-thaw cycles.
Review Cleavage and Isoforms
Check whether the target protein has known cleavage products, truncated forms, or splice variants. If possible, compare your band size with published Western blot data for the same protein and sample type.
Adjust Gel Running Conditions
Use the correct gel percentage for your target size. If the band appears too low, review running time, voltage, buffer condition, and ladder migration.
Why Are Western Blot Bands Higher Than Expected?
Western blot bands higher than expected usually mean the protein migrated more slowly than predicted or the antibody detected a larger form of the protein.
Gel Not Run Long Enough
If electrophoresis is stopped too early, proteins may not separate properly. Bands can remain higher on the Gel and look larger than expected. Run the Gel long enough for the molecular weight ladder to separate around the target protein range.
Acrylamide Percentage Is Too High
High acrylamide gels have smaller pores. They are useful for small proteins but can slow large proteins too much. If the gel percentage is too high, high molecular weight proteins may appear higher than expected. For large targets, use a lower percentage gel or a gradient gel.
Post-Translational Modifications
Post-translational modifications can increase the apparent molecular weight of a protein. Glycosylation, phosphorylation, ubiquitination, SUMOylation, and acetylation can shift Western blot bands upward or create a smear. Bio-Rad notes that slightly higher or blurry bands may indicate protein modifications such as glycosylation. If this is suspected, compare treated and untreated samples, use modification-specific antibodies, or apply enzymatic treatment where appropriate.
Incomplete Denaturation or Reduction
Western blot sample preparation usually uses SDS, heat, and reducing agents to unfold proteins and break disulfide bonds. If this step is incomplete, proteins may remain partially folded or form dimers and multimers. These larger forms may appear as bands higher than expected. Use fresh loading buffer, fresh reducing agent, and suitable heating conditions for your target protein.
Protein Aggregation
Some proteins aggregate during lysis, heating, or storage. Aggregated proteins may migrate slowly and appear near the top of the Gel as high molecular weight bands or smears. Avoid excessive heating, use compatible lysis buffers, and keep protein concentration within a suitable range.
Antibody Cross-Reactivity
Sometimes the antibody detects a different protein with a similar epitope. This can create a band above or below the expected size. Multiple bands may also occur when antibody concentration is too high or blocking is not optimized. Bio-Rad lists antibody cross-reactivity and similar epitopes as possible causes of unexpected molecular weight bands.
How to Fix Western Blot Bands That Are Higher Than Expected
A higher band can often be improved by optimizing gel choice, sample preparation, and antibody validation.
Use the Right Gel Percentage
Choose a lower percentage gel for high molecular weight proteins. Use a gradient gel if you need to detect both small and large proteins in the same experiment.
Improve Reduction and Denaturation
Use fresh DTT, beta-mercaptoethanol, or another suitable reducing agent. Prepare fresh sample buffer and heat samples according to the target protein’s needs. Some membrane proteins may require gentler heating to avoid aggregation.
Check for Protein Modifications
If the protein is glycosylated, phosphorylated, ubiquitinated, or otherwise modified, the higher band may be the correct biological form. Use treatment controls or modification-specific antibodies to confirm.
Validate Antibody Specificity
Use positive and negative control lysates. If available, include knockdown or knockout controls. You can also test another antibody that recognizes a different region of the target protein.
Role of Gel Percentage in Western Blot Band Position
Gel percentage has a direct effect on how protein bands migrate.
A low percentage gel is better for larger proteins because it allows them to move through the Gel more easily. A high percentage gel is better for smaller proteins because it slows migration and improves separation. Gradient gels are useful when protein sizes vary widely or when the exact apparent molecular weight is uncertain.
Role of Sample Preparation in Western Blot Troubleshooting
Good Western blot results begin before the Gel is loaded. Sample preparation affects protein stability, solubility, migration, and final band quality.
Protein Extraction Quality
Efficient extraction helps release target proteins while preserving their integrity. FireGene notes that efficient protein extraction and accurate quantification are important for reliable comparison and downstream normalization in Western blotting.
Lysis Buffer Compatibility
Choose the lysis buffer based on the target protein. RIPA buffer is commonly used for total protein extraction, while milder buffers may be better for sensitive proteins. Membrane or nuclear proteins may need specialized extraction conditions.
Protein Concentration and Loading Amount
Unequal loading can make band interpretation harder. Measure protein concentration before loading and use consistent loading amounts across samples.
Reducing and Denaturing Conditions
Use fresh loading buffer and reducing agents. Make sure the denaturation method is suitable for the protein. Overheating can affect some proteins, while underheating can cause incomplete denaturation.
Transfer-Related Reasons for Unexpected Protein Bands
Transfer does not usually change true protein size, but it can affect how bands appear on the membrane. High molecular weight proteins may transfer poorly and remain in the Gel. Small proteins may pass through the membrane if transfer is too strong or too long. Poor membrane contact, air bubbles, incorrect transfer orientation, or unsuitable buffer conditions can also affect band quality.
Check transfer using Ponceau S or another reversible total protein stain before antibody incubation.
Antibody-Related Causes of Unexpected Western Blot Bands
Antibody choice strongly affects Western blot bands. An antibody may detect the target, an isoform, a cleavage fragment, or a non-specific protein.
Non-Specific Antibody Binding
Too much primary antibody can increase non-specific signal. Incomplete blocking and high secondary antibody concentration can also create unexpected bands.
Antibody Detecting Isoforms or Fragments
If the antibody epitope is present in several isoforms or fragments, multiple bands may appear. Review the immunogen region and expected isoform sizes.
Using Controls for Confidence
Use a positive control, negative control, molecular weight marker, loading control, and secondary-only control. These controls make band interpretation easier and more reliable.
Western Blot Troubleshooting Guide: Quick Cause and Solution Table
|
Band Problem |
Possible Cause |
Solution |
|
Band lower than expected |
Protein degradation |
Use fresh sample, keep cold, add protease inhibitors |
|
Band lower than expected |
Cleavage fragment |
Check known protein processing |
|
Band lower than expected |
Smaller isoform |
Review splice variants and use another antibody |
|
Band lower than expected |
Gel run too long |
Monitor ladder and reduce run time |
|
Band higher than expected |
PTM or glycosylation |
Use treatment control or PTM-specific antibody |
|
Band higher than expected |
Acrylamide too high |
Use lower percentage or gradient gel |
|
Band higher than expected |
Incomplete reduction |
Use fresh reducing agent and loading buffer |
|
Band higher than expected |
Protein aggregation |
Optimize lysis and heating conditions |
|
Unexpected extra bands |
Antibody cross-reactivity |
Use controls or alternative antibody |
How to Prevent Lower or Higher Bands in Future Western Blot Experiments
The best prevention strategy is to keep the Western blot workflow consistent from sample preparation to detection. Use fresh lysates, suitable lysis buffer, protease inhibitors, correct gel percentage, clean transfer setup, validated antibodies, and proper controls. Record gel percentage, running voltage, running time, transfer conditions, antibody dilutions, incubation time, and exposure settings.
FireGene supports Western blot workflow needs through protein extraction, electrophoresis, transfer and blocking, buffers, antibody dilution buffers, and related reagents for dependable protein detection.
FAQs
Why are Western blot bands lower than expected?
Western blot bands may appear lower than expected because of protein degradation, cleavage fragments, smaller isoforms, gel run time, low acrylamide percentage, or sample buffer effects.
Why are Western blot bands higher than expected?
Western blot bands may appear higher than expected because of post-translational modifications, incomplete reduction, incomplete denaturation, protein aggregation, high acrylamide percentage, or antibody cross-reactivity.
Can protein degradation cause lower Western blot bands?
Yes. Protein degradation can create smaller fragments that still contain the antibody-binding site, resulting in lower molecular weight bands.
Can glycosylation make Western blot bands appear higher?
Yes. Glycosylation can increase the apparent molecular weight of a protein and make the band appear higher or broader than expected.
How does acrylamide percentage affect Western blot bands?
Higher acrylamide gels are better for smaller proteins, while lower acrylamide gels are better for larger proteins. Choosing the wrong gel percentage can make bands appear too high, too low, or poorly separated.
How do I know if an unexpected Western blot band is real?
Use positive and negative controls, check antibody specificity, compare with published data, test another antibody, review known isoforms or modifications, and include knockdown or knockout controls when available.
Conclusion
Bands that are lower or higher than expected in Western blot are common and often easy to understand with a structured troubleshooting approach. The key is to review the result logically instead of changing every step at once.
Start with sample quality, then check gel percentage, running time, transfer conditions, antibody specificity, protein modifications, and controls. With a consistent Western blot workflow, researchers can improve band clarity, strengthen confidence in protein detection, and produce more reliable results.


